실습 6: AutoGen 멀티 에이전트 그룹챗 구현
- AutoGen Core API의 기본 개념 이해
- 이벤트 기반 에이전트 시스템 구현
- Topic과 Subscription을 통한 에이전트 간 통신
- LLM 기반 에이전트 셀렉터 패턴 적용
- 실제 동작하는 멀티 에이전트 애플리케이션 개발
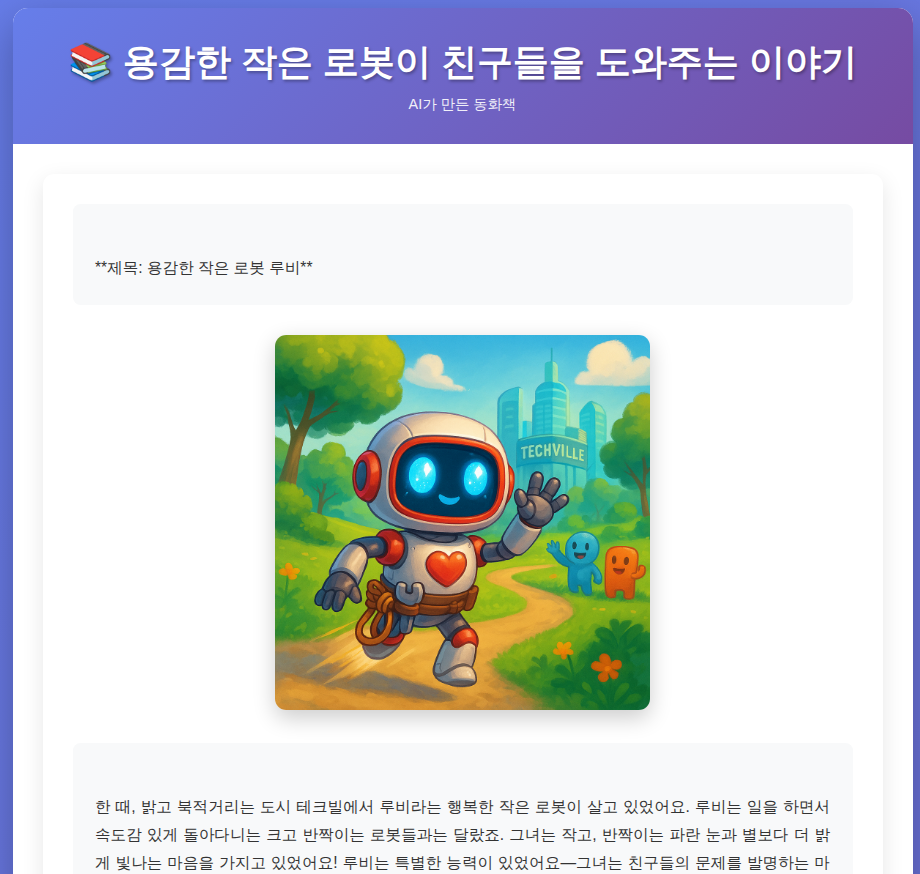
이번 실습에서는 Microsoft AutoGen Core API를 사용하여 여러 AI 에이전트가 협업하는 그룹 채팅 시스템을 직접 구현합니다. 작가, 편집자, 일러스트레이터 에이전트가 함께 동화책을 만드는 실전 프로젝트입니다.
결과 예시:
AutoGen 소개
AutoGen이란?
Microsoft AutoGen은 대규모 언어 모델(LLM) 기반의 다중 에이전트 시스템을 구축하기 위한 오픈소스 프레임워크입니다. 복잡한 작업을 여러 AI 에이전트가 협업하여 해결할 수 있도록 설계되었으며, 각 에이전트는 특정 역할과 능력을 가지고 독립적으로 동작합니다.
핵심 개념
1. 멀티 에이전트 시스템 (Multi-Agent System)
AutoGen의 핵심은 여러 에이전트가 협업하는 것입니다. 단일 AI 모델로는 해결하기 어려운 복잡한 문제를 여러 전문 에이전트로 분산하여 처리합니다.
주요 특징:
- 역할 기반 설계: 각 에이전트는 특정 역할(작가, 편집자, 개발자 등)을 수행
- 이벤트 기반 통신: 에이전트 간 메시지 교환을 통한 협업
- 확장 가능성: 필요에 따라 에이전트를 추가하거나 제거 가능
- 자율성: 각 에이전트는 독립적으로 판단하고 행동
2. 에이전트 아키텍처
AutoGen 에이전트는 다음과 같은 구조로 동작합니다:
구성 요소:
- Agent Runtime: 에이전트 실행 환경 및 메시지 라우팅
- Topic: 메시지 채널 (예: "group_chat")
- Subscription: 에이전트가 구독하는 메시지 타입
- Message Handler: 메시지를 처리하는 에이전트 메서드
- LLM Client: 언어 모델 API (GPT-4, Claude 등)
- Tools: 에이전트가 사용할 수 있는 함수/도구
3. 통신 패턴
AutoGen은 다양한 통신 패턴을 지원합니다:
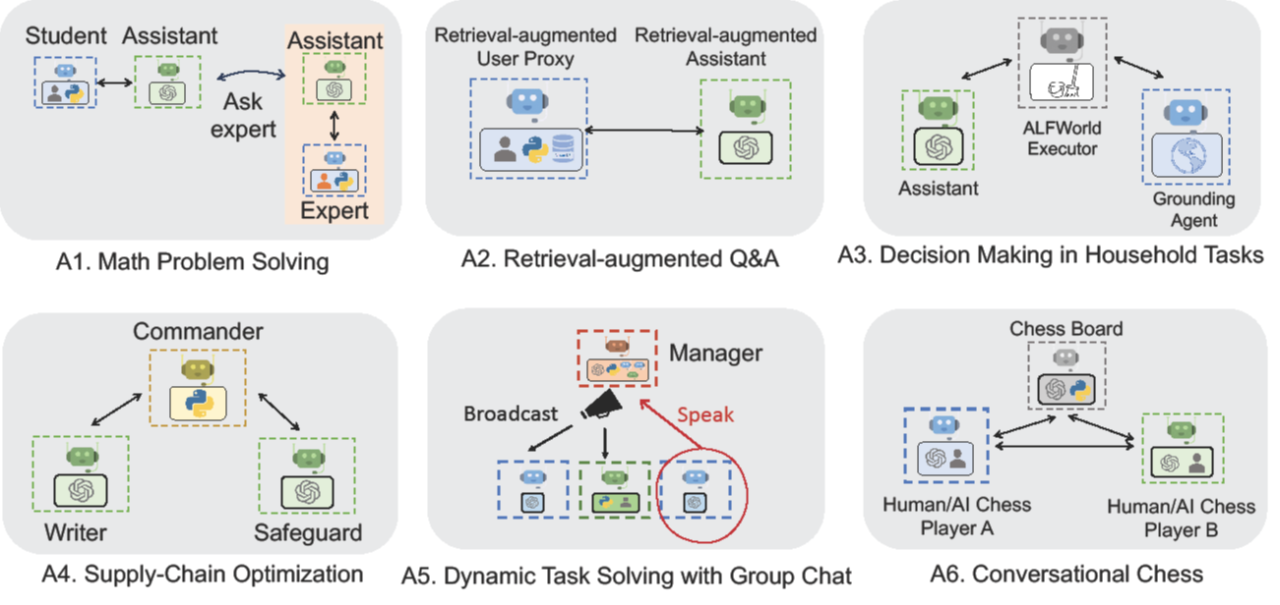
A1. 순차적 협업 (Sequential Collaboration)
- 학생 → 어시스턴트 → 전문가 순서로 문제 해결
- 각 단계에서 전문성이 증가하는 구조
A2. 검색 증강 (Retrieval-Augmented)
- User Proxy가 외부 지식 베이스 검색
- Assistant가 검색 결과를 활용하여 답변 생성
A3. 의사결정 체인 (Decision Chain)
- ALFWorld Executor가 실제 환경과 상호작용
- Assistant와 Grounding Agent가 협력하여 가정 작업 수행
A4. 계층적 관리 (Hierarchical Management)
- Commander가 전체 작업 조율
- Writer와 Safeguard가 병렬로 작업 수행
A5. 그룹 챗 (Group Chat) ⭐ 이번 실습의 핵심
- Manager가 다음 발언자 선택 (Selector 패턴)
- 여러 에이전트가 동적으로 대화에 참여
- Broadcast를 통한 메시지 공유
A6. 대화형 게임 (Conversational Game)
- Chess Board가 게임 상태 관리
- 두 플레이어(Human/AI)가 턴제로 진행
AutoGen Core API vs AutoGen AgentChat
AutoGen은 두 가지 주요 API 레벨을 제공합니다:
| 구분 | AutoGen Core | AutoGen AgentChat |
|---|---|---|
| 추상화 수준 | 저수준 (Low-level) | 고수준 (High-level) |
| 유연성 | 높음 (완전한 제어) | 중간 (편의성 우선) |
| 학습 곡선 | 가파름 | 완만함 |
| 사용 사례 | 커스텀 에이전트 시스템 | 일반적인 챗봇/어시스턴트 |
| 이번 실습 | ✅ Core API 사용 |
이번 실습에서는 AutoGen Core API를 사용하여 에이전트 시스템의 내부 동작 원리를 직접 구현하고 이해합니다.
그룹 챗 패턴 상세 분석
이번 실습에서 구현할 그룹 챗 패턴의 동작 방식:
핵심 메커니즘:
-
Topic/Subscription 패턴
- 에이전트는 특정 Topic을 구독
- 메시지는 Topic에 발행되어 구독자 모두에게 전달
- 느슨한 결합(Loose Coupling)으로 확장성 확보
-
LLM 기반 셀렉터
- 대화 히스토리와 에이전트 설명을 분석
- 컨텍스트에 가장 적합한 다음 발언자 선택
- 동적이고 지능적인 대화 흐름 생성
-
메시지 타입 구분
GroupChatMessage: 모든 에이전트가 공유하는 대화 내용RequestToSpeak: 특정 에이전트에게만 전달되는 발언 요청
AutoGen의 장점
1. 모듈화 및 재사용성
- 에이전트를 독립적인 모듈로 개발
- 다른 프로젝트에서 에이전트 재사용 가능
2. 확장성
- 새로운 에이전트 추가가 용이
- 시스템 구조 변경 없이 기능 확장
3. 테스트 가능성
- 각 에이전트를 개별적으로 테스트
- Mock 에이전트로 통합 테스트 용이
4. 실세계 문제 해결
- 복잡한 워크플로우 자동화
- 소프트웨어 개발, 데이터 분석, 콘텐츠 제작 등
실제 활용 사례
- 소프트웨어 개발: 개발자, 리뷰어, 테스터 에이전트 협업
- 콘텐츠 제작: 작가, 편집자, 디자이너 에이전트 협업
- 데이터 분석: 데이터 수집, 분석, 시각화 에이전트 협업
- 고객 지원: 1차 응대, 전문가, 에스컬레이션 에이전트 협업
사전 준비사항
- Python 3.10 이상 설치
uv패키지 관리자 (설치 방법)- OpenAI API 키 (또는 Azure OpenAI 엔드포인트)
- GitHub Copilot 확장 프로그램 설치
- 터미널/명령 프롬프트 사용 기본 지식
도전 과제
GitHub Copilot의 도움을 받아 다음 과제를 해결해보세요:
- 기본 예제 코드 작성 및 실행
-
openai패키지 기반 예제를azure-openai패키지로 변경 - DALL-E는 키 인증 제한이 있으므로 대안 모델로 구현 (예:
gpt-image-1-mini) -
IllustratorAgent가 정상적으로 이미지를 생성하는지 테스트 코드로 검증 (컨텍스트 프롬프트 활용) - 터미널 출력에서는 이미지 표시가 제한되므로, 결과를 HTML 파일로 생성하도록 Agent 수정
실습 개요
작가(Writer), 편집자(Editor), 일러스트레이터(Illustrator) 세 명의 AI 에이전트가 협업하여 동화책을 만드는 그룹 채팅 시스템을 구현합니다. 각 에이전트는 특정 역할을 맡아 메시지를 주고받으며, 그룹 채팅 매니저가 다음 발언자를 선택합니다.
Step 1: 환경 구성하기
1.1 uv 설치 및 프로젝트 초기화
터미널을 열고 다음 명령어를 실행합니다:
Windows (PowerShell):
# uv 설치
irm https://astral.sh/uv/install.ps1 | iex

# 프로젝트 디렉토리 생성 및 이동
mkdir autogen-group-chat
cd autogen-group-chat

# uv로 Python 3.12 설치 및 가상환경 생성
uv venv --python 3.12

# 가상환경 활성화
.venv\Scripts\activate
uv init
Mac/Linux:
# uv 설치
curl -LsSf https://astral.sh/uv/install.sh | sh

# 프로젝트 디렉토리 생성 및 이동
mkdir autogen-group-chat
cd autogen-group-chat

# uv로 Python 3.12 설치 및 가상환경 생성
uv venv --python 3.12

# 가상환경 활성화
source .venv/bin/activate
uv init
1.2 필수 패키지 설치
# AutoGen과 필수 패키지 한 번에 설치
uv pip install autogen-core autogen-ext openai rich pydantic pillow
설치 확인:
uv pip list | grep autogen
출력 예시:
autogen-core        0.7.5
autogen-ext         0.7.5
uv pip 명령어 특징:
- 의존성을 병렬로 다운로드하여 설치 속도 대폭 향상
- 충돌하는 의존성 자동 감지 및 해결
- 기존 pip 명령어와 호환 가능한 인터페이스
1.3 API 키 설정
OpenAI API 키 설정:
# Windows (PowerShell)
$env:OPENAI_API_KEY="your-api-key-here"

# Mac/Linux
export OPENAI_API_KEY="your-api-key-here"
환경 변수 확인:
# Windows (PowerShell)
echo $env:OPENAI_API_KEY

# Mac/Linux
echo $OPENAI_API_KEY
.env 파일을 사용하여 환경 변수를 관리할 수도 있습니다.
1.4 VS Code에서 프로젝트 열기
code .
VS Code에서 Python 인터프리터 선택:
Ctrl+Shift+P(Mac:Cmd+Shift+P)- "Python: Select Interpreter" 입력
.venv폴더의 Python 선택 (uv가 생성한 가상환경)
Step 2: 기본 메시지 프로토콜 정의
2.1 새 파일 생성
VS Code에서 group_chat_basics.py 파일을 생성합니다.
2.2 메시지 타입 정의
다음 코드를 입력합니다 (GitHub Copilot이 자동 완성을 도와줄 것입니다):
from pydantic import BaseModel
from autogen_core.models import UserMessage

class GroupChatMessage(BaseModel):
    """그룹 채팅에서 사용되는 메시지"""
    body: UserMessage

class RequestToSpeak(BaseModel):
    """에이전트에게 발언 권한을 요청하는 메시지"""
    pass
코드 설명:
GroupChatMessage: 모든 에이전트가 공유하는 메시지 형식RequestToSpeak: 그룹 채팅 매니저가 특정 에이전트에게 발언 권한을 부여할 때 사용pydantic.BaseModel: 타입 안전성과 데이터 검증 제공
2.3 Copilot에게 설명 요청
Copilot Chat에 질문:
@workspace 위 코드에서 BaseModel을 사용하는 이유와
GroupChatMessage가 왜 body 필드를 가지는지 설명해주세요.
Step 3: 기본 에이전트 클래스 구현
3.1 필요한 임포트 추가
group_chat_basics.py 파일 상단에 추가:
import json
from typing import List
import openai
from autogen_core import (
    RoutedAgent,
    MessageContext,
    DefaultTopicId,
    message_handler,
    FunctionCall,
    Image,
)
from autogen_core.models import (
    ChatCompletionClient,
    LLMMessage,
    SystemMessage,
    AssistantMessage,
)
from autogen_core.tools import FunctionTool
from rich.console import Console
from rich.markdown import Markdown
3.2 BaseGroupChatAgent 클래스 작성
Copilot이 도와줄 수 있도록 주석으로 의도를 명확히 작성:
class BaseGroupChatAgent(RoutedAgent):
    """
    LLM을 사용하는 기본 그룹 채팅 에이전트.

    이 클래스는:
    1. 그룹 채팅 메시지를 수신하고 대화 히스토리에 저장
    2. RequestToSpeak 메시지를 받으면 LLM을 호출하여 응답 생성
    3. 생성된 응답을 그룹 채팅 토픽에 발행
    """

    def __init__(
        self,
        description: str,
        group_chat_topic_type: str,
        model_client: ChatCompletionClient,
        system_message: str,
    ) -> None:
        super().__init__(description=description)
        self._group_chat_topic_type = group_chat_topic_type
        self._model_client = model_client
        self._system_message = SystemMessage(content=system_message)
        self._chat_history: List[LLMMessage] = []
Copilot 활용 팁:
- 주석을 작성하면 Copilot이 구현 코드를 제안합니다
Tab키로 제안을 수락하세요
3.3 메시지 핸들러 구현
메소드를 하나씩 구현합니다. 주석을 먼저 작성하고 Copilot의 제안을 확인하세요:
    @message_handler
    async def handle_message(self, message: GroupChatMessage, ctx: MessageContext) -> None:
        """
        그룹 채팅 메시지를 수신하고 대화 히스토리에 추가.

        Args:
            message: 수신된 그룹 채팅 메시지
            ctx: 메시지 컨텍스트
        """
        # 대화 히스토리에 메시지 추가
        self._chat_history.extend([
            UserMessage(content=f"Transferred to {message.body.source}", source="system"),
            message.body,
        ])
    @message_handler
    async def handle_request_to_speak(self, message: RequestToSpeak, ctx: MessageContext) -> None:
        """
        발언 요청을 받고 LLM 응답 생성 후 그룹에 발행.

        Args:
            message: 발언 요청 메시지
            ctx: 메시지 컨텍스트
        """
        # 콘솔에 에이전트 이름 출력
        Console().print(Markdown(f"### {self.id.type}:"))

        # 시스템 메시지 추가
        self._chat_history.append(
            UserMessage(
                content=f"Transferred to {self.id.type}, adopt the persona immediately.",
                source="system"
            )
        )

        # LLM 호출하여 응답 생성
        completion = await self._model_client.create(
            [self._system_message] + self._chat_history
        )

        assert isinstance(completion.content, str)

        # 응답을 히스토리에 추가
        self._chat_history.append(
            AssistantMessage(content=completion.content, source=self.id.type)
        )

        # 콘솔에 응답 출력
        Console().print(Markdown(completion.content))

        # 그룹 채팅 토픽에 메시지 발행
        await self.publish_message(
            GroupChatMessage(
                body=UserMessage(content=completion.content, source=self.id.type)
            ),
            topic_id=DefaultTopicId(type=self._group_chat_topic_type),
        )
3.4 코드 이해하기
Copilot Chat에 질문:
@workspace BaseGroupChatAgent 클래스에서
@message_handler 데코레이터의 역할과
async/await 패턴이 왜 사용되는지 설명해주세요.
Step 4: 전문 에이전트 구현
4.1 WriterAgent 작성
BaseGroupChatAgent를 상속받아 작가 에이전트를 구현:
class WriterAgent(BaseGroupChatAgent):
    """동화를 작성하는 작가 에이전트"""

    def __init__(
        self,
        description: str,
        group_chat_topic_type: str,
        model_client: ChatCompletionClient
    ) -> None:
        super().__init__(
            description=description,
            group_chat_topic_type=group_chat_topic_type,
            model_client=model_client,
            system_message="You are a Writer. You produce engaging children's stories with vivid descriptions.",
        )
4.2 EditorAgent 작성
class EditorAgent(BaseGroupChatAgent):
    """작품을 검토하고 피드백을 제공하는 편집자 에이전트"""

    def __init__(
        self,
        description: str,
        group_chat_topic_type: str,
        model_client: ChatCompletionClient
    ) -> None:
        super().__init__(
            description=description,
            group_chat_topic_type=group_chat_topic_type,
            model_client=model_client,
            system_message="""You are an Editor.
            Plan and guide the task given by the user.
            Provide critical feedback to the draft produced by Writer.
            Approve if the task is completed and the draft meets user's requirements.
            Say 'APPROVED' when the work is satisfactory.""",
        )
4.3 IllustratorAgent 작성 (gpt-image-1-mini 이미지 생성)
FunctionTool을 사용하여 gpt-image-1-mini로 실제 이미지를 생성하는 일러스트레이터 에이전트:
class IllustratorAgent(BaseGroupChatAgent):
    """gpt-image-1-mini를 사용하여 실제 이미지를 생성하는 일러스트레이터 에이전트"""

    def __init__(
        self,
        description: str,
        group_chat_topic_type: str,
        model_client: ChatCompletionClient,
        image_client: openai.AsyncClient,
    ) -> None:
        super().__init__(
            description=description,
            group_chat_topic_type=group_chat_topic_type,
            model_client=model_client,
            system_message="""You are an Illustrator.
            You use the generate_image tool to create images given user's requirement.
            Make sure the images have consistent characters and style.""",
        )
        self._image_client = image_client
        # 이미지 생성 도구 정의
        self._image_gen_tool = FunctionTool(
            self._image_gen,
            name="generate_image",
            description="Call this to generate an image."
        )

    async def _image_gen(
        self,
        character_appearence: str,
        style_attributes: str,
        worn_and_carried: str,
        scenario: str
    ) -> str:
        """DALL-E를 사용하여 이미지 생성"""
        prompt = f"Digital painting of a {character_appearence} character with {style_attributes}. Wearing {worn_and_carried}, {scenario}."
        response = await self._image_client.images.generate(
            prompt=prompt,
            model="dall-e-3",
            response_format="b64_json",
            size="1024x1024"
        )
        return response.data[0].b64_json  # type: ignore

    @message_handler
    async def handle_request_to_speak(self, message: RequestToSpeak, ctx: MessageContext) -> None:  # type: ignore
        """발언 요청을 받고 이미지 생성 후 그룹에 발행"""
        Console().print(Markdown(f"### {self.id.type}:"))

        self._chat_history.append(
            UserMessage(
                content=f"Transferred to {self.id.type}, adopt the persona immediately.",
                source="system"
            )
        )

        # 이미지 생성 도구를 반드시 사용하도록 설정
        completion = await self._model_client.create(
            [self._system_message] + self._chat_history,
            tools=[self._image_gen_tool],
            extra_create_args={"tool_choice": "required"},
            cancellation_token=ctx.cancellation_token,
        )

        assert isinstance(completion.content, list) and all(
            isinstance(item, FunctionCall) for item in completion.content
        )

        images: List[str | Image] = []
        for tool_call in completion.content:
            arguments = json.loads(tool_call.arguments)
            Console().print(arguments)

            # 도구 실행하여 이미지 생성
            result = await self._image_gen_tool.run_json(arguments, ctx.cancellation_token)
            image = Image.from_base64(self._image_gen_tool.return_value_as_string(result))

            # 이미지 리사이즈 (표시용)
            image = Image.from_pil(image.image.resize((256, 256)))

            # Jupyter나 IPython 환경에서 이미지 표시
            try:
                from IPython.display import display
                display(image.image)  # type: ignore
            except ImportError:
                # IPython이 없는 환경에서는 파일로 저장
                import datetime
                timestamp = datetime.datetime.now().strftime("%Y%m%d_%H%M%S")
                filename = f"generated_image_{timestamp}.png"
                image.image.save(filename)
                Console().print(f"[green]Image saved to {filename}[/green]")

            images.append(image)

        await self.publish_message(
            GroupChatMessage(
                body=UserMessage(content=images, source=self.id.type)
            ),
            DefaultTopicId(type=self._group_chat_topic_type),
        )
코드 설명:
FunctionTool: 에이전트가 사용할 수 있는 도구를 정의_image_gen: DALL-E API를 호출하여 실제 이미지 생성tool_choice="required": LLM이 반드시 도구를 사용하도록 강제- 생성된 이미지는 base64로 받아서 PNG로 변환
- Jupyter 환경에서는 inline 표시, 아니면 파일로 저장
위 코드는 OpenAI 제공 코드입니다. GitHub Copilot 활용하여 실제 이미지 생성을 스킵하도록 프롬프트를 한 후 정상 결과가 나오면 도전과제의 대안을 구현해야 합니다.
Step 5: UserAgent 구현
5.1 UserAgent 클래스 작성
사용자 입력을 받아 그룹 채팅에 전달하는 에이전트:
class UserAgent(RoutedAgent):
    """사용자를 대표하는 에이전트"""

    def __init__(self, description: str, group_chat_topic_type: str) -> None:
        super().__init__(description=description)
        self._group_chat_topic_type = group_chat_topic_type

    @message_handler
    async def handle_message(self, message: GroupChatMessage, ctx: MessageContext) -> None:
        """그룹 채팅 메시지 수신 (프론트엔드로 전달할 위치)"""
        pass

    @message_handler
    async def handle_request_to_speak(self, message: RequestToSpeak, ctx: MessageContext) -> None:
        """사용자 입력을 받아 그룹에 전달"""
        user_input = input("Enter your message (type 'APPROVE' to conclude): ")
        Console().print(Markdown(f"### User:\n{user_input}"))

        await self.publish_message(
            GroupChatMessage(
                body=UserMessage(content=user_input, source=self.id.type)
            ),
            DefaultTopicId(type=self._group_chat_topic_type),
        )
Step 6: GroupChatManager 구현
6.1 GroupChatManager 클래스 작성
다음 에이전트를 선택하는 매니저 구현:
import string

class GroupChatManager(RoutedAgent):
    """그룹 채팅을 관리하고 다음 발언자를 선택하는 매니저"""

    def __init__(
        self,
        participant_topic_types: List[str],
        model_client: ChatCompletionClient,
        participant_descriptions: List[str],
    ) -> None:
        super().__init__("Group chat manager")
        self._participant_topic_types = participant_topic_types
        self._model_client = model_client
        self._chat_history: List[UserMessage] = []
        self._participant_descriptions = participant_descriptions
        self._previous_participant_topic_type: str | None = None
6.2 메시지 핸들러 구현
    @message_handler
    async def handle_message(self, message: GroupChatMessage, ctx: MessageContext) -> None:
        """그룹 채팅 메시지를 수신하고 다음 발언자 선택"""
        assert isinstance(message.body, UserMessage)
        self._chat_history.append(message.body)

        # 사용자가 승인하면 종료
        if message.body.source == "User":
            assert isinstance(message.body.content, str)
            if message.body.content.lower().strip(string.punctuation).endswith("approve"):
                return

        # 메시지 히스토리 포맷팅
        messages: List[str] = []
        for msg in self._chat_history:
            if isinstance(msg.content, str):
                messages.append(f"{msg.source}: {msg.content}")

        history = "\n".join(messages)

        # 역할 목록 포맷팅 (이전 발언자 제외)
        roles = "\n".join([
            f"{topic_type}: {description}".strip()
            for topic_type, description in zip(
                self._participant_topic_types,
                self._participant_descriptions,
                strict=True
            )
            if topic_type != self._previous_participant_topic_type
        ])

        # 다음 발언자 선택 프롬프트
        selector_prompt = """You are in a role play game. The following roles are available:
{roles}.

Read the following conversation. Then select the next role from {participants} to play.
Only return the role name.

{history}

Read the above conversation. Then select the next role from {participants} to play.
Only return the role name."""

        system_message = SystemMessage(
            content=selector_prompt.format(
                roles=roles,
                history=history,
                participants=str([
                    topic_type
                    for topic_type in self._participant_topic_types
                    if topic_type != self._previous_participant_topic_type
                ]),
            )
        )

        # LLM으로 다음 발언자 선택
        completion = await self._model_client.create(
            [system_message],
            cancellation_token=ctx.cancellation_token
        )

        assert isinstance(completion.content, str)

        # 선택된 에이전트에게 발언 요청
        for topic_type in self._participant_topic_types:
            if topic_type.lower() in completion.content.lower():
                self._previous_participant_topic_type = topic_type
                await self.publish_message(
                    RequestToSpeak(),
                    DefaultTopicId(type=topic_type)
                )
                return

        raise ValueError(f"Invalid role selected: {completion.content}")
Step 7: 런타임 설정 및 실행
7.1 런타임 생성 및 에이전트 등록
새로운 파일 run_group_chat.py를 생성하고 다음 코드를 작성:
import asyncio
import uuid
import openai
from autogen_core import SingleThreadedAgentRuntime, TypeSubscription, DefaultTopicId, TopicId
from autogen_ext.models.openai import OpenAIChatCompletionClient
from group_chat_basics import (
    GroupChatMessage,
    WriterAgent,
    EditorAgent,
    IllustratorAgent,
    UserAgent,
    GroupChatManager,
)
from autogen_core.models import UserMessage

async def main():
    # 런타임 생성
    runtime = SingleThreadedAgentRuntime()

    # 토픽 타입 정의
    editor_topic_type = "Editor"
    writer_topic_type = "Writer"
    illustrator_topic_type = "Illustrator"
    user_topic_type = "User"
    group_chat_topic_type = "group_chat"

    # 에이전트 설명
    editor_description = "Editor for planning and reviewing the content."
    writer_description = "Writer for creating any text content."
    user_description = "User for providing final approval."
    illustrator_description = "An illustrator for creating image descriptions."

    # OpenAI 모델 클라이언트 생성
    model_client = OpenAIChatCompletionClient(
        model="gpt-4o-mini",
    )

    # Editor 에이전트 등록
    editor_agent_type = await EditorAgent.register(
        runtime,
        editor_topic_type,
        lambda: EditorAgent(
            description=editor_description,
            group_chat_topic_type=group_chat_topic_type,
            model_client=model_client,
        ),
    )
    await runtime.add_subscription(
        TypeSubscription(topic_type=editor_topic_type, agent_type=editor_agent_type.type)
    )
    await runtime.add_subscription(
        TypeSubscription(topic_type=group_chat_topic_type, agent_type=editor_agent_type.type)
    )

    # Writer 에이전트 등록
    writer_agent_type = await WriterAgent.register(
        runtime,
        writer_topic_type,
        lambda: WriterAgent(
            description=writer_description,
            group_chat_topic_type=group_chat_topic_type,
            model_client=model_client,
        ),
    )
    await runtime.add_subscription(
        TypeSubscription(topic_type=writer_topic_type, agent_type=writer_agent_type.type)
    )
    await runtime.add_subscription(
        TypeSubscription(topic_type=group_chat_topic_type, agent_type=writer_agent_type.type)
    )

    # Illustrator 에이전트 등록
    illustrator_agent_type = await IllustratorAgent.register(
        runtime,
        illustrator_topic_type,
        lambda: IllustratorAgent(
            description=illustrator_description,
            group_chat_topic_type=group_chat_topic_type,
            model_client=model_client,
            image_client=openai.AsyncClient(
                # API 키는 환경 변수에서 자동으로 로드됩니다
            ),
        ),
    )
    await runtime.add_subscription(
        TypeSubscription(topic_type=illustrator_topic_type, agent_type=illustrator_agent_type.type)
    )
    await runtime.add_subscription(
        TypeSubscription(topic_type=group_chat_topic_type, agent_type=illustrator_agent_type.type)
    )

    # User 에이전트 등록
    user_agent_type = await UserAgent.register(
        runtime,
        user_topic_type,
        lambda: UserAgent(
            description=user_description,
            group_chat_topic_type=group_chat_topic_type
        ),
    )
    await runtime.add_subscription(
        TypeSubscription(topic_type=user_topic_type, agent_type=user_agent_type.type)
    )
    await runtime.add_subscription(
        TypeSubscription(topic_type=group_chat_topic_type, agent_type=user_agent_type.type)
    )

    # GroupChatManager 등록
    group_chat_manager_type = await GroupChatManager.register(
        runtime,
        "group_chat_manager",
        lambda: GroupChatManager(
            participant_topic_types=[
                writer_topic_type,
                illustrator_topic_type,
                editor_topic_type,
                user_topic_type
            ],
            model_client=model_client,
            participant_descriptions=[
                writer_description,
                illustrator_description,
                editor_description,
                user_description
            ],
        ),
    )
    await runtime.add_subscription(
        TypeSubscription(topic_type=group_chat_topic_type, agent_type=group_chat_manager_type.type)
    )

    # 런타임 시작
    runtime.start()

    # 그룹 채팅 시작
    session_id = str(uuid.uuid4())
    await runtime.publish_message(
        GroupChatMessage(
            body=UserMessage(
                content="Please write a short children's story about a brave little robot.",
                source="User",
            )
        ),
        TopicId(type=group_chat_topic_type, source=session_id),
    )

    # 완료될 때까지 대기
    await runtime.stop_when_idle()

    # 클린업
    await model_client.close()

    print("\n✅ Group chat completed!")

if __name__ == "__main__":
    asyncio.run(main())
7.2 실행하기
터미널에서 실행:
python run_group_chat.py
Step 8: 결과 확인 및 개선
8.1 실행 결과 확인
(DALL-E 생략)프로그램이 실행되면 다음과 같은 출력을 볼 수 있습니다:
### Writer:
Once upon a time, in a small workshop...

### Illustrator:
{
  'character_appearence': 'A small brave robot with shiny metal body',
  'style_attributes': 'Colorful and friendly, digital art style',
  'worn_and_carried': 'A red cape and tool belt',
  'scenario': 'Standing in a workshop with mechanical parts around'
}
Image saved to generated_image_20260112_173045.png

### Editor:
The story structure is good, but consider adding...

Enter your message (type 'APPROVE' to conclude):
이미지 생성 참고사항:
- DALL-E 3 사용 시 추가 비용이 발생합니다 (이미지당 $0.04-0.08)
- 생성된 이미지는 현재 디렉토리에 PNG 파일로 저장됩니다
- Jupyter Notebook에서 실행하면 이미지가 inline으로 표시됩니다
8.2 Copilot으로 개선하기(선택 사항)
Copilot Chat에 다음과 같이 질문:
@workspace 현재 구현된 그룹 채팅 시스템에서
다음 기능을 추가하려면 어떻게 해야 할까요?

1. 대화 히스토리를 파일로 저장
2. 각 에이전트의 응답 시간 측정
3. 특정 키워드가 나오면 자동으로 특정 에이전트 호출
8.3 대화 히스토리 저장 기능 추가(선택 사항)
Copilot의 도움을 받아 다음 코드를 추가:
import json
from datetime import datetime

class ConversationLogger:
    """대화 히스토리를 저장하는 로거"""

    def __init__(self, filename: str = None):
        if filename is None:
            timestamp = datetime.now().strftime("%Y%m%d_%H%M%S")
            filename = f"conversation_{timestamp}.json"
        self.filename = filename
        self.history = []

    def log_message(self, agent_type: str, content: str):
        """메시지 로깅"""
        self.history.append({
            "timestamp": datetime.now().isoformat(),
            "agent": agent_type,
            "content": content
        })

    def save(self):
        """파일로 저장"""
        with open(self.filename, 'w', encoding='utf-8') as f:
            json.dump(self.history, f, ensure_ascii=False, indent=2)
        print(f"\n💾 Conversation saved to {self.filename}")
8.4 결과 파일 위치
결과 파일 다운로드(암호 필요)
Step 9: 디버깅 및 문제 해결
9.1 일반적인 오류와 해결 방법
오류 1: ModuleNotFoundError
ModuleNotFoundError: No module named 'autogen_core'
해결 방법:
# 가상환경이 활성화되었는지 확인
source .venv/bin/activate  # Mac/Linux
# 또는
.venv\Scripts\activate  # Windows

# 패키지 재설치
uv pip install autogen-core autogen-ext
오류 2: API 키 오류
openai.AuthenticationError: Incorrect API key provided
해결 방법:
# 환경 변수 다시 설정
export OPENAI_API_KEY="your-actual-api-key"
오류 3: 응답이 생성되지 않음
에이전트가 응답하지 않는 경우, 시스템 메시지를 더 명확하게 수정:
system_message="You are a Writer. You MUST respond with a short story. Start immediately."
9.2 Copilot으로 디버깅
에러가 발생하면 Copilot Chat에 다음과 같이 질문:
@workspace 다음 에러가 발생했습니다:
[에러 메시지 붙여넣기]

이 에러의 원인과 해결 방법을 알려주세요.
Step 10: 확장 실습
10.1 새로운 에이전트 추가
과제: "Critic" 에이전트를 추가하여 작품에 대한 비평 제공
Copilot에게 다음과 같이 요청:
@workspace CriticAgent를 구현하고 싶습니다.
이 에이전트는 다음 기능을 수행해야 합니다:

1. Writer가 작성한 스토리를 분석
2. 감정적 임팩트 평가 (1-10점)
3. 개선 제안 제공

CriticAgent 클래스를 작성해주세요.
10.2 발언 순서 커스터마이징
현재는 LLM이 다음 발언자를 선택하지만, 규칙 기반으로 변경:
class RuleBasedGroupChatManager(RoutedAgent):
    """규칙 기반 그룹 채팅 매니저"""

    def __init__(self, participant_topic_types: List[str]):
        super().__init__("Rule-based group chat manager")
        self._participants = participant_topic_types
        self._current_index = 0

    @message_handler
    async def handle_message(self, message: GroupChatMessage, ctx: MessageContext) -> None:
        # 라운드 로빈 방식으로 다음 발언자 선택
        next_participant = self._participants[self._current_index]
        self._current_index = (self._current_index + 1) % len(self._participants)

        await self.publish_message(
            RequestToSpeak(),
            DefaultTopicId(type=next_participant)
        )
10.3 웹 인터페이스 추가 (선택 과제)
FastAPI를 사용하여 웹 인터페이스 추가:
uv pip install fastapi uvicorn
Copilot에게 요청:
@workspace 현재 그룹 채팅 시스템에 FastAPI 웹 인터페이스를 추가하고 싶습니다.
사용자가 브라우저에서 메시지를 입력하고 에이전트 응답을 실시간으로 볼 수 있도록 구현해주세요.
실습 완료 체크리스트
다음 항목을 모두 완료했는지 확인하세요:
- uv 설치 및 가상환경 생성
- uv를 사용한 패키지 설치
- OpenAI API 키 설정
-
GroupChatMessage와RequestToSpeak메시지 타입 정의 -
BaseGroupChatAgent구현 -
WriterAgent,EditorAgent,IllustratorAgent구현 -
UserAgent구현 -
GroupChatManager구현 - 런타임 설정 및 에이전트 등록
- 그룹 채팅 실행 및 결과 확인
- (선택) 대화 히스토리 저장 기능 추가
- (선택) 새로운 에이전트 추가
- (선택) 웹 인터페이스 추가
학습 정리
핵심 개념
- RoutedAgent: AutoGen에서 메시지를 라우팅하는 기본 에이전트 클래스
- Topic과 Subscription: 에이전트 간 통신을 위한 pub-sub 패턴
- MessageHandler: 특정 메시지 타입을 처리하는 메소드 데코레이터
- SingleThreadedAgentRuntime: 에이전트를 실행하는 단일 스레드 런타임
AutoGen 아키텍처
┌─────────────────────────────────────────┐
│      SingleThreadedAgentRuntime         │
├─────────────────────────────────────────┤
│  Topic: group_chat                      │
│  ├─ Editor (subscribe)                  │
│  ├─ Writer (subscribe)                  │
│  ├─ Illustrator (subscribe)             │
│  ├─ User (subscribe)                    │
│  └─ GroupChatManager (subscribe)        │
│                                         │
│  Topic: Editor                          │
│  └─ Editor (subscribe)                  │
│                                         │
│  Topic: Writer                          │
│  └─ Writer (subscribe)                  │
│                                         │
│  ...                                    │
└─────────────────────────────────────────┘
메시지 흐름
1. User publishes GroupChatMessage to group_chat topic
   ↓
2. GroupChatManager receives message, selects next speaker
   ↓
3. GroupChatManager publishes RequestToSpeak to speaker's topic
   ↓
4. Speaker receives RequestToSpeak, generates response
   ↓
5. Speaker publishes GroupChatMessage to group_chat topic
   ↓
6. Repeat from step 2 until termination condition
추가 학습 자료
공식 문서
GitHub 저장소
커뮤니티
다음 단계
이제 AutoGen의 기본을 이해했으니 다음 주제를 탐색해보세요:
- 도구 통합: FunctionTool을 사용하여 에이전트에 외부 도구 추가
- 상태 관리: 에이전트 간 공유 상태 관리
- 분산 런타임: 여러 머신에서 에이전트 실행
- AgentChat API: 더 높은 수준의 추상화로 빠른 개발
피드백
이 실습에 대한 피드백을 GitHub Issues나 Discussions에 남겨주세요!
작성일: 2025년 1월
AutoGen 버전: 0.4.0
대상 독자: Python 1년 경험자